CHAPTER XIII
PIERCED PATTERNS
Exercise in Background Pattern - Care as to Stability - Drilling and Sawing out the Spaces - Some Uses for Pierced Patterns.
CLICK HERE CLICK HERE The present exercises may be described as a kind of carved open fretworkthat is to [111] say, the ground is entirely cut away, leaving the pattern standing free. This will form an excellent piece of discipline with regard to the design of background forms, because in such work as this, those forms assert themselves in a very marked manner; if they are in any way found to be conspicuously unequal in size or are awkwardly designed as to shape, the whole effect of the work is spoiled.
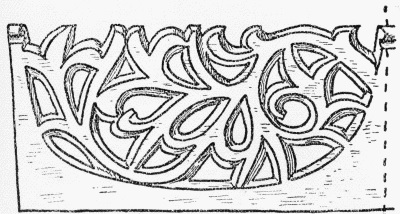
For your first effort make a design based upon No. 24, and please to observe these rules in its construction. The main or leading lines of the pattern are to run as much as possible without crossing each other. The holes are to be fairly equal in [112] size, or rather in area, as they need not be at all like each other in shape. The amount of wood left standing to be of a width averaging never less than half the length of the average-sized hole. This is necessary for securing sufficient strength of
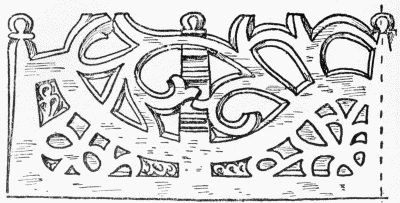
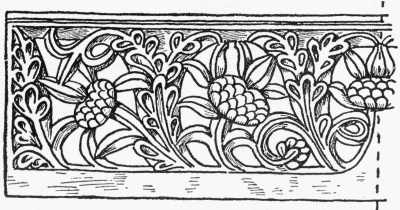
material in the cross-grained pieces, which would be liable to split if made too long and narrow. The pattern should be formal in character, not necessarily symmetrical, but it should be well balanced. You may have one part of your design composed of large holes and another of small ones, provided the change is part of a definite design, as in Fig. 25. You may even leave the wood in some parts forming a solid background, or you may treat [113] it as a separate piece of simple carving on the solid, as in Fig. 26, being careful to execute it in a consistently simple manner, as in this kind of work much change of manner in execution is inadvisable, although, at the same time, it is open to any amount of variety in design of outline and combination of contrasts.
Start with a piece of pine about 3 or 4 ft. long and 7 or 9 ins. wide by 3/4 in. thick. Trace your pattern onto it, and drill circular holes in the middle of each space to be cut through. Next, take a keyhole saw, or, more easily, a jigsaw, and remove the wood by sawing round the space close to the blue line, taking care not to cut through it in any place. The saw must be held very truly [114] upright in order to cut the sides of the spaces at right angles to the face of the wood. Now carve the pattern on the surface in whatever manner you have designedin grooves suggesting the articulation of the leaves, in short grooves which may pass for additional leaves, or in a dozen ways which practise may help you to invent.
The wood should be held tightly down to the bench in all its parts, or, at least, in those being operated upon, as it may, if unsupported, crack across some of the narrow parts. The sides of all the holes must be carved out clean to remove the rough saw marks. This can be done partly by gouges, or still better, the wood may be held up on its edge and the holes cut round with a sharp penknife where the grain allows it. Now turn the work over on its face and carve bevels round each of the holes. This reduces the apparent thickness of wood, and adds to the effect of delicacy in the pattern.
This work may be used for the cresting of some large piece of furniture, or may be adapted to fill screens or partitions, stair newels, and balusters, or it may be used as a cornice decoration in the manner [115] suggested by No. 26, where the pierced work can be backed by a hollow cornice which it fills and enriches.
In our next exercise we shall try our hands upon a piece of hardwood for a changemeantime do one or two of these fret patterns by way of disciplinary exercise in outline forms.


|
INFORMATION ABOUT HOW TO MAKE MONEY FROM WOOD CARVING |